
Printing Labels with Cirris Testers
Cirris testers have always had the ability to connect to a printer for hard-copy printouts. More and more, however, customers are asking for the ability to print (WYSIWYG – What You See is What You Get) labels from their Cirris testers.
Easy-Wire™ testers (CR, CH+ and CH2) have always had this capability through the Reports Section of the Easy-Wire software. Now the Signature 1100 series (1100R+ and 1100H+), as well as the Touch 1 testers, have this capability by utilizing the optional Scripting feature.
There are many good reasons to put labels on cables:
1. To identify tested “Good” cables vs. “Bad” cables.
2. Some cables may require serial numbers for identification and tracking purposes.
3. Cables that fail during testing may need to be identified with rework information.
4. Cables that are sold commerically would usually require the company logo on the labels.
5. Other cables may need time, date, and serial number stamps for quality tracking purposes.
6. Perhaps your manufacturing process requires labels for finished boxes of product, etc.
Whatever your reasons for labeling cables or bags of cables, it is now made easier with the features recently added to the Cirris 1100 Series testers.


Printing Labels with the Easy-Wire software:

When you’re done editing your label, you can save your edited Test Label as the new system default, or create a custom test label for each test program that you use.
- What do I need to print test labels with my Easy-Wire tester?
- Label Printer (serial, parallel or USB)
- Windows printer drivers loaded onto the PC that is running the Easy-Wire software.
Easy-Wire CR, CH+, CH2 Testers:

Easy-Wire software, version 5.0 and higher, has included the capability to print labels.
- A. In the TEST PROGRAM EDITOR, select the (Set Test Defaults Tab–usually tab 3 at the top of the window, see screen to the left).
- B. At the bottom of this page select ‘Configure Reports/Auto Print’ button.
- C. The ‘Configure Printing’ window will open. Select the ‘Test Labels’ button (see screen to the left).
- D. The ‘Test Labels’ window will open (see below).
If this is the first time the ‘Test Labels’ window has been open, the default screen will show a list of possible label elements you can choose from. If a previous label had been saved as the default, then that label will be displayed in the window. Please note that standard ‘Windows’ conventions are used to make changes to the label layout i.e., right click on an element to change its Font type, Font size, Color, etc. etc. To move the element around on the page, simply left click and hold then move the element where you want it to be.


Printing WYSIWYG Labels with the 1100 series testers:

3rd Party, Label Design Software

Label Report Generation Utility

Signature Touch 1 and 1100 Series Testers:
Signature Touch 1 and 1100 series testers print labels by utilizing a 3rd party label creation software that provides ‘Print-to-file’ capability.
- 1. The first step to print labels on the 1100 series of testers, is to use a 3rd party software package to design the label you wish to print. (software must have Print-to-file capability)
- 2. The second step would be to run the Cirris, Label Report Generation Utility, which will transform the label file (created in step 1), into a script file.
- 3. Transfer the new script file to the 1100 tester with CTLWIN software. The script file must reside in the root directory with the regular test files. This is the default location for all test files.
- 4. Using the 1100 tester, learn your wire list as usual. Set user preferences. When you set ‘AUTO PRINT – ON’ you will have the option to select which script/report file you wish to use (this is where the script file is selected and linked to your test).
- 5. The tester will print the selected label when the test results match the requirement i.e., Good Cable or Bad Cable is detected etc. (or when other selected criteria is met).


Used Pancon Label on Bag of Connectors.

Top arrow: Select script filter from drop down.
Left Arrow: Highlight script you wish to copy to tester.
Bottom Arrow: Press right arrow button to copy file to tester.
Printing WYSIWYG Labels with the Touch 1 testers:
3rd Party, Label Design Software

Label Report Generation Utility
Signature Touch 1 Testers:
- 1. The first step to print labels on the Touch 1 is exactly the same as the 1100 series. You must design the label with the 3rd party software package (remember the software must have Print-to-File capability).Signature Touch 1 will also print labels by utilizing the 3rd party label creation software that has the ‘Print-to-file’ capability.
- 2. The second step would be to run the Cirris Label Report Generation Utility, which will transform the label file (created in step 1), into a script file.
- 3. Transfer this script file to the Touch 1 using a 3 1/2″ floppy or via a network connection. The Touch 1 must have the scripting option enabled in order to print custom labels.
- 4. Setting up the Touch 1 tester to use the script is not handled on this page, but information can be found in the Touch 1 software or in the user manual under ‘Custom Reports.’
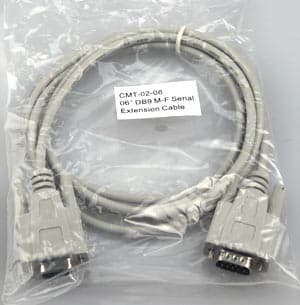
Simple Label on Serial Cable bag