Getting Started with Grid Tiles
Our easy-wire System makes building any harness board fast and easy. Here we show you how to build a harness board that uses grid tiles. This example shows you:
- What you need
- How to Install the Grid Tiles
- How to use the Grid Board
Contact us and we can help you adapt the easy-wire system to your harness assembly process.
To Install the grid tiles you need:
- The 25 grid tile assembly clips included in the Grid Starter Pack.
- A variable speed drill or screwdriver equipped with a torque setting and a small #1 Phillips bit.
- Three-quarters-inch (18mm) thick hardwood faced plywood, available at lumber stores. This will allow a hard mounting surface for the tiles, but still allow the small tile screws to penetrate into the plywood without breaking.
Installation
Cut the hardwood-faced plywood to the appropriate size. Each Cirris Grid Tile measures 3.85 inches (98 mm) square. On this board a 3.85 inch “margin” was left on the right and left side to make room for the Adapter Transition Boards
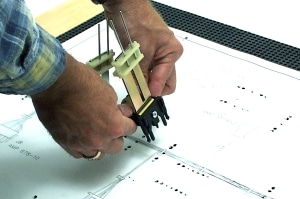
Using the grid assembly clips, assemble a section of the grid tiles. Make sure the tiles fit correctly and are square to the plywood edge.

Adjust the torque setting on the screwdriver to the lowest setting that will still allow the tile screw to drive into the wood.
Do not over-tighten the tile screws! The torque setting on many screw drivers and drills varies with driver RPM. As the screw head reaches the grid tile, slow the driver speed. This will help insure the screws are not over-tightened causing the tiles to pull into the surface, or the screws to break.

Make sure that each tile is clipped to the adjacent tiles before you screw it down to the plywood. Starting in one corner, screw down the tiles.

Continue assembling from one side of the grid board to the other, moving the tile assembly clips across the board as you go.

Using the Grid Board
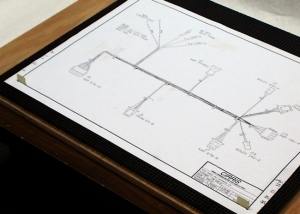
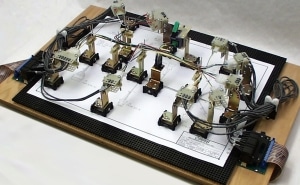
The Cirris grid board hole spacing is .275 inches (7mm), which means a harness setup may be configured to just over 1/8 inch (3.5mm) accuracy. Simple changes can be quickly made to the harness setup. In many cases the entire setup can be removed and a new setup installed in a matter of minutes. Use a sample cable or a copy of a scale drawing to help position the components on the grid board.

To use a scale drawing for setup:
Attach your drawing to the grid using the grid assembly clips. Make sure the drawing is square to the grid board.
Look straight down on the component parts to find the correct orientation. Make notes on the drawing if necessary to record the configuration of brackets– such as the bracket rotation and nail position.

Repeat setups can be made quickly by using old puncture marks and duplicating previous bracket configuration.

The Cirris easy-wire System offers a “Lego™ like” approach to the assembly of harness boards. Quick and easy set up and change over of harness boards will save you time, money and space. There is no need to store another plywood harness board again. Use the easy-wire Grid System instead.


