Custom Label Printing for the 1100 Series testers
This guide will show you how to create a custom label that uses scripting to populate information. First we need to create a label using the label software that the printer itself comes with. For this example we will use “Zebra Designer 2”. Start by setting the label dimensions and proceed to put anything desired into the label design. Use realistic dates
and numbers so the spacing will be correct on the final label. Make sure to use a printer font for any text or barcodes that are going to be changed with scripting.

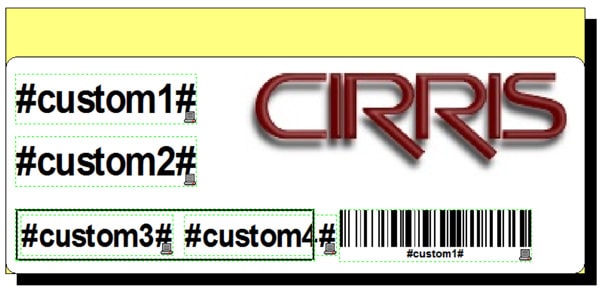
Printing the label is necessary to confirm the alignment and may take a few tries to get right. Once we have a good label design, it’s time to change the text for the fields we need to have updated with scripting. In this example we will be changing the part number, serial number, date, time, and barcode. The text needs to be changed to include a “#” before and
after the variable. We will be naming ours: #customl#, #custom2#, #custom3# and #custom4#. Scripting passes a “string” to each of these variables. We will be using #customl# for “Part Number Text” and “Part Number Barcode” since they will both be passed the same “string”. Make sure not to move any of the fields. They may not look right any
longer (this is normal–that’s why we got everything aligned earlier).

Now you need to “Print to File”. We are done with the printer’s labeling software and it is now time to load Cirris’ “Label Report Generation Utility”. Select the file you just created using “Print to File” for the printer output file :
- The token sentinel string should be”#”.
- Change to your desired print method: good, bad or all.
- Select the location to have the custom script saved to.
- Set a label name if desired.
- Generate the report script file.

We now have a _PRN script file to work with. It will print looking how it looked before with the #custom# fields if we
make no changes to it. We need to open the _PRN script with a simple text editor such as Windows Notepad.
The script should look something like this:
The script should look something like this:
— $** USES_LABELS **$
function DoCustomReport()
PrintLabel(“LABEL1”)
end
— $** LABEL_DEFINITION **$
–$FORMAT: 01$
–$COMMENT: C:\labl.prn- 5/25/2012@ 1:22:04 PM$
–$LABEL: LABEL1$
— EFBBBF1043547E7E43442C7E43435E7E43547EODOA5E584L…and so on
We need to begin by editing the script to pass the four #custom# variables to the printer. We do this by adding them to
the PrintLabeline. Example: Printlabel (“LABEL”, custom1, custom2, custom3, custom4)
Don’t put more #custom# variables than you are using. Now we need to create string variables named custom1,
custom2, custom3, and custom4. We must give those variables a value that will get passed from the tester onto the
printer. In the following example GetWirelistlnfoAsText, PromptForUserlnformation, GetDateAsText, and
GetTimeAsText are all used to pass the information to the variables. For more information on these or other scripting
functions reference the “Lua Scripting Manual”.
— $** USES_LABELS **$
function DoCustomReport()
custom1 = GetWirelistInfoAsText(3) –Part Number
custom2 = PromptForUserInformation(1, “Enter The Serial Number For”, GetWirelistInfoAsText(3), 30) –Serial Number
if not custom2 then — If No SN
custom2 = 0 — Make It Zero
end
custom3 = GetDateAsText(5) — MM/DD/YYYY
custom4 = GetTimeAsText(4) — HH/MM/SS
PrintLabel(“LABEL1”, custom1, custom2, custom3, custom4)
end
— $** LABEL_DEFINITION **$
–$FORMAT: 01$
–$COMMENT: C:\label.prn- 5/25/2012@ 1:22:04 PM$
–$LABEL: LABEL1$
— EFBBBF1043547E7E43442C7E43435E7E43547EODOA5E584l…and so on
Now all you have to do is save the file and we will have a script ready for printing custom labels. After getting the file
onto the tester go to Set Preferences / Set Auto Print / Auto Print: ON, Auto: and choose your file name. Note that the file name must still be “autoall.rpt”, “autogood.rpt”, or “autobad.rpt”.
Scripting will give you all sorts of options. You can have the date, time, and other critical test information print right
on the label. You can have the script ask for user-entered information and even work with math or other data in the
background. You can have the script recognize the test program name and make decisions on what is important to
print. There is a lot you can accomplish with label scripting but, the important thing to remember is that everything gets
passed onto the label from variables.

