

Producing Labels with Easy-Wire® and Easy-Touch®
Cirris testers have always had the ability to connect to a printer for hard-copy printouts. More and more, however, customers are asking for the ability to print WYSIWYG (What You See is What You Get) labels from their Cirris testers.
Our Easy-Wire testers (CR, Easy-Touch and CH2) have this capability through the Reports Section of the Easy-Wire software. Now the Signature 1100 series (1100R+ and 1100H+), as well as the Touch 1 testers, have this capability by utilizing the optional Scripting feature.
There are many good reasons to put labels on cables:
1. To identify tested “good” cables vs. “bad” cables.
2. Some cables may require serial numbers for identification and tracking purposes.
3. Cables that fail during a test may need to be identified with rework information.
4. Cables that are sold commerically would usually require the company logo on the labels.
5. Other cables may need time, date, and serial number stamps for quality tracking purposes.
6. Perhaps your manufacturing process requires labels for finished boxes of product, etc.
Whatever your reasons for labeling cables or bags of cables, it is now made easier with the features recently added to the Cirris 1100 Series testers.
Note: For the Easy-Touch, generating the bitmap image on a desktop computer and copying with a thumb drive is recommended. A mouse and Keyboard can be attached to the Easy-Touch for editing purposes.
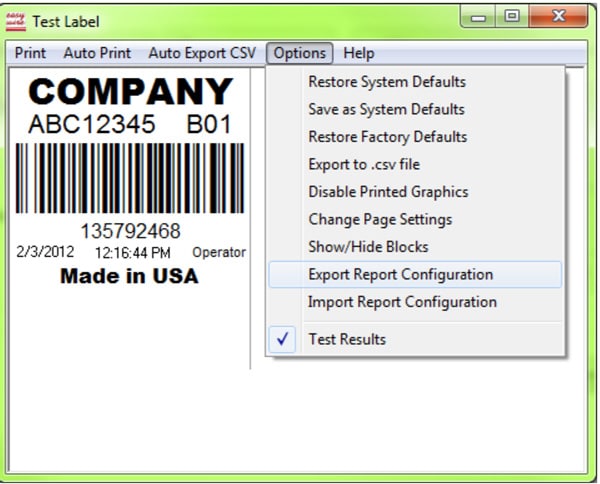
In this example, we will be creating a label for Easy-Wire that looks like this:

Step 1: Generate a bitmap image that will handle most of the static information on the label.
The static information on the label is the information specific to the wire list or device-under-test that never changes. Bar
codes are easily handled when static. In this example we are placing the barcode, along with as much static information as we can, into the bitmap image. The reason for doing this is because Easy-Wire has only three custom fields for static information, but, in this example, we need more . Bitmap images must be above any dynamic information otherwise the fields will be overlapped and won’t print. In this example “Made in USA” never changes, however it is considered dynamic because it can be changed at anytime throughout Easy-Wire without having to edit the bitmap image.
Cirris recommends Microsoft Paint for editing the bitmap image. Microsoft Paint can be located in windows by going to: Start/All Programs/Accessories/Paint.
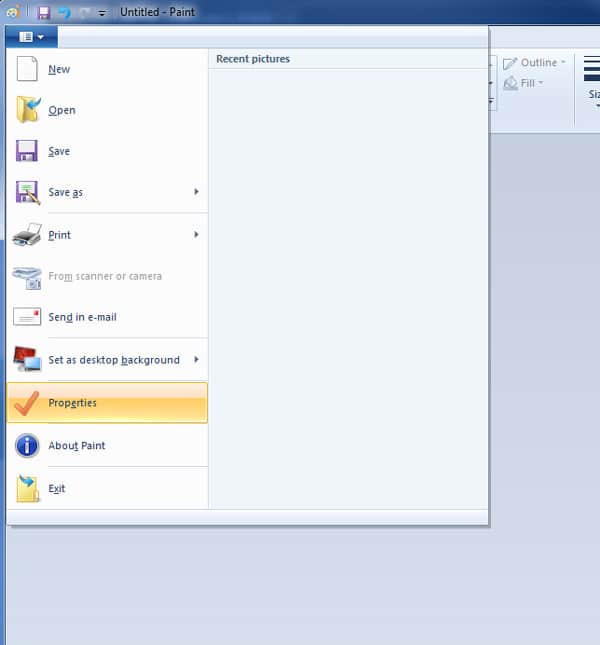
Change the image size to 2 inches by 2 inches. You can find these settings under: File/Properties. Change units to inches. Change the height and width to 2 inches.Enter in the company name, the product or the part number of the item (in this case it was ABC12345 B01). Next we need to create the barcode. The barcode that we are using for this example will read “123456789”. We need to have the correct font and a barcode encoder installed to make the barcode.
Select the barcode font in the text options.
We chose HC39M for our font. With the HC39 barcodes a start and a stop symbol is needed (it is the “*” asterisk symbol). With IDAutomationHC39M selected we can now type in our barcode *123456789*. Use a font size that will be legible to a barcode scanner, print and test the barcode to be sure the scanner can read it before continuing.
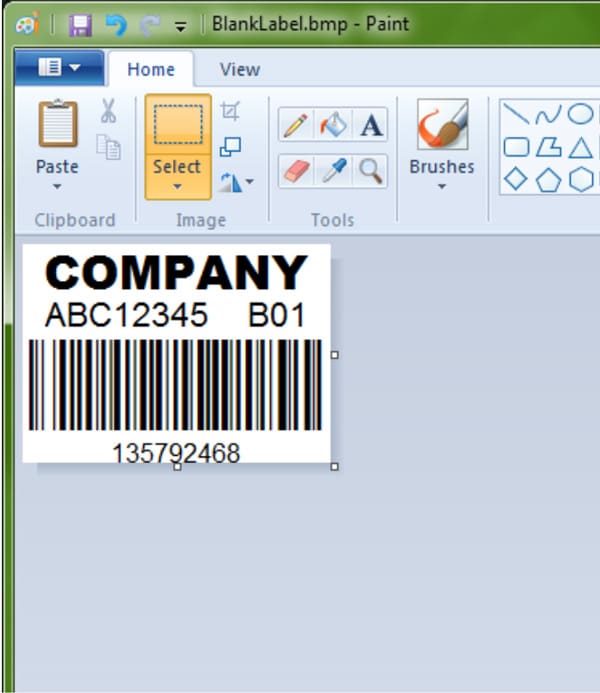
Next update all the information that you need in the bitmap. In this example we added our company name, entered in the part number of our item, and entered in the Barcode ID of *123456789*. We suggest that you crop out all unused space at the bottom of the bitmap. When finished, you will need to save this image as a bitmap.
Note: Easy-Wire will look for your bitmap in the same location every time it prints a label. So save it in a good location where you don’t expect it to get moved or deleted.
Step 2: Create a label in Easy-Wire
Load Easy-Wire and load or create a test program. Once the program is saved you may edit a label. In the “Test Program Editor” window select tab “2. Set Test Defaults”. Next select “Configure Reports/Auto Print” then “Test Label”. The “Test Label” window will open and by default will have some
dynamic information. Don’t bother editing any dynamic information yet. Right-click the upper left-hand corner of the label edit field.

The cursor in the picture above indicates where you should right-click.

Once you have right-clicked, select “New Bitmap” and select the image you saved in the “Open” window. Your image will show up behind the dynamic information for editing purposes; however it will print on-top of dynamic information. Move or delete the dynamic information to suit your needs. Make sure to place everything below the bitmap image. You may also right click on fields of dynamic information and change certain attributes such as text, font, or headings. If you right-click in the window you will also have the option of adding more fields including custom and dynamic.
Your label is now finished!