Last month we talked about best practices to use when including Smart-Lights devices in your test process. This month we want to discuss another useful tool that helps organize adapter cables. Header strips are useful for setting up fixturing without wasting test points. The boards connect directly to Cirris 8100 and CH2 testers and provide a platform for connecting fixturing cables. The cables can be changed with ease to accommodate different test needs.
Header strips make it convenient to switch out different fixturing cables fast. However, there are some best practice procedures that will help you avoid errors during testing. Keeping a consistent setup, using Smart-Lights devices, and staying organized will help ensure an error-proof test process.
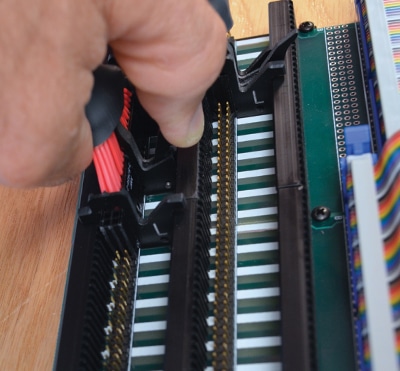
If you use header strips, take note of the tips below.
Test Point Positions
Header strips consist of two rows. Both rows contain the same test point positions. Cirris added two rows on the header strips to create room for the fixturing cables. The second row contains the same test points as the first. Rather than waste a test point because one cable does fit neatly next to another cable, you can plug the cable into the row below or above. Be careful NOT to overlap the previous test points already being used on the alternating row.
Smart-Lights Devices with Header Strips
In order to achieve accurate test results, test programs must have consistent information. This includes setting up the hardware (tester, fixturing, and device-under-test) so it remains consistent for each test. If any of these pieces change, a new test program must be created. Even something as small as moving a piece of fixturing to a different position on the header strip can cause a test to fail.
Smart-Lights devices relieve the burden of remembering the position in which the cables are connected to the header strip. With Smart-Lights devices, the cables can be attached to the header strip in any order. The software will read the Smart-Lights device and identify the fixturing cable. This lets you switch out fixturing cables on the header strip without needing to take time to check the order before testing.
Header Strip to Tester
While fixturing cables with Smart-Lights devices can be connected in any order on the header strip, the cables connecting the header strip to the tester must be wired in the same sequential order for each test. Header strips set up next to each other form a continuous row of test points. Rearranging the headers strips or the cables leading from the header strip to the tester can create errors in test setup and testing.
To learn more about header strips and other useful testing accessories, check out the Accessories section of the cirris.com.